Showing posts with label Desserts. Show all posts
Images

Giant Mini Eggs (Oxymorons!)


This took a while but was worth it. I've seen slightly different versions that are much quicker, but I like to make things difficult for myself. Instead of a solid block of chocolate I decide I wanted a solid chocolate 'shell' with a truffle centre. Now, none of this was particularly difficult. It was all just very fiddly and time consuming. I think it was definitely worth it, but be prepared to spend some time on this.

I started with the humble egg.


Most of the pictures I'd seen had massive holes or cracks in the egg to get the chocolate in, I didn't want this so decided I would give egg blowing a try. It worked pretty well by all accounts. A pin prick sized hole at one end and a slightly larger hole at the other end.


The thought of getting raw egg in my mouth lead me to seek out alternative methods off separating egg from shell. They didn't work. Somebody had told me about a way o separating yolk and white with a bottle and I wondered if this would work with getting the egg out. It started to draw some out but the bottle collapsed long before the first egg was done.


So it was back to the drawing board. I simply used a knife with a very sharp point and just kept tapping gently in the same spot until the right sized hole was made.


I wasn't always as gentle as I should have been and a few of these did crack. I kept them though as I figured you do occasionally get a few cracked sweets in a pack.


Once all holes are made you simply need to blow through the smaller hole. If this proves tricky you can either make the larger, bottom hole larger or simply make sure its clear. There is a layer of membrane inside the egg and this is stronger than it looks. It can and does stop anything from getting through regardless of how hard you blow. I did 20 eggs so I had a lot of egg going spare. I used this up making brioche though which I'll show in a later post.


 It was the time to clean the eggs. Since I didn't crack the tops off I couldn't see inside so couldn't be sure I had gotten all of the egg out of the shell. I didn't want to crack my shells open and find they were covered in egg so I figured the best way to get it all out was to boil the shells. The eggs will float to start with so a bowl placed on top of them will stop this happening. I also toyed with adding the colour at this stage but the volume o water warranted too much vinegar to make the colour stick so the rest were coloured after being boiled.


I boiled the eggs for around 15 minutes to be sure. I the removed them from the pan and placed them in cold water. Once all the water was drained I used two methods. I either shook the eggs to break up any loose bits inside after running the tap into the bigger hole at the bottom, or I filled them through the bigger hole and then blew through the smaller hole as I had to get the uncooked egg out. boiled egg is surprisingly pliable and  what was let inside did actually come out through the hole at the bottom. Then I placed them in another bowl of water with a few tablespoons of vinegar and whichever colour I was using.


I then drained them again and placed on paper towel and in egg cups to dry. I repeated these steps for each colour used.


I left these to dry overnight to make sure there was no loose colour that would stain the chocolate. Once dry I started to melt my chocolate for the shell and then filled the eggs using a syringe. This was the pretty easy but very time consuming!


I did this twice on each egg and then placed them in the fridge over night to set. The next morning I removed them and repeated the process, again shaking the egg to try and make sure all the surface was covered. On the first night I stored them with the small hole facing down and the second time the large hole was facing down to try and ensure even coverage.

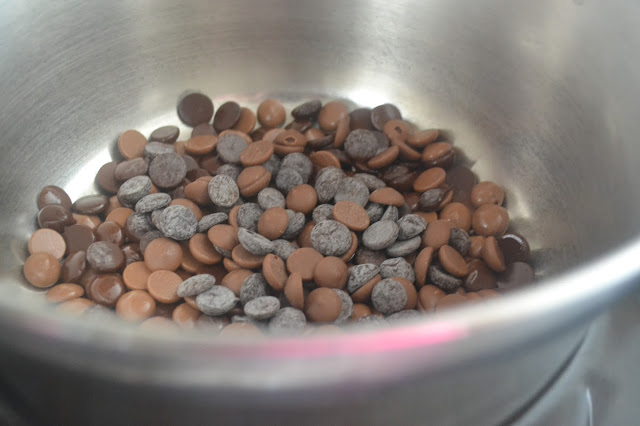
While the second coat was setting (around half an hour) I started making the truffle. For the white chocolate I started by making a caramel. This was just sugar and, a small amount of water and, once it had dissolved, vanilla and cream. I placed it in an old empty container then made the rest of the truffle mix.


Since I had placed the eggs with the larger hole down it was blocked so I used a heated pin to clear the hole then filled them with truffle (which I had placed in the fridge to cool down and firm up slightly. This was done randomly instead of in layers. The eggs were then placed in the fridge overnight to set.


I think they came out pretty great and, with a bit more organisation next year, I could probably get this all done in one day. I think they look amazing and, even better still, they taste amazing. The outer 'shell' of chocolate has a nice bite to it and contrasts well with the truffle in the middle. I may make it slightly thicker next time though. Other than that, amazing! The sort of thing you'd definitely want to hide from predators...


Images

Cocktail Cupcakes: TGI Fridays's Barnamint Baileys

Today I had my first day off work since the New Year (not counting being of sick!) and having nothing to do I decided to bake! Woohoo!

I don't have much in the house in the way of fancy ingredients at the minute but I had most of the basics so figured I could make something work. I have had an idea in my head for the longest time about making a range of cupcakes based on cocktails and, though I have no eggs, was determined to start today. I know some of the more everyday cocktails have been tackled in this way already but what I aim to do over the next couple of weeks (or months or however long it takes) is make a much wider range. The having no eggs and being to lazy to go to the shops part was my only stumbling block so I set about finding an eggless cake recipe. I'll be honest, I didn't look for long because I really couldn't be bothered. I mean, I really wanted to make the cupcakes but I'm damned if I'm going to spend all morning researching then spend all afternoon experimenting then spend all evening icing and typing. Like I said, first day off this year people!

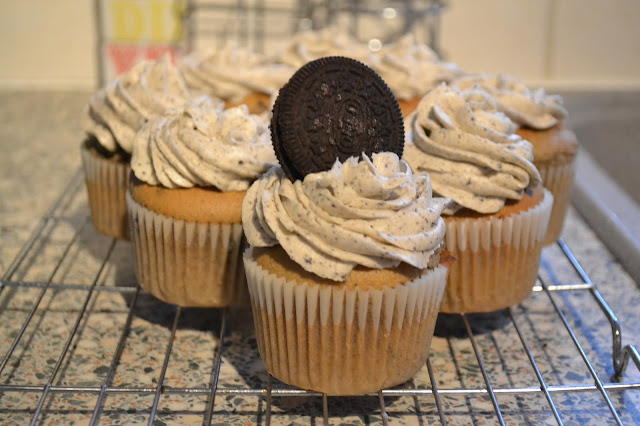
I love the Barnamint Baileys Cocktail served at TGI's and practially drink it like a milkshake whenever I get one (drink responsibly!). It seemed like the obvious place to start. This is the recipe I used and slightly adapted to make the cupcakes. Whilst they are delicious I will definitely be making this again using an adapted version of my regular vanilla cake recipe. There was just something...lacking. They were moist, fluffy and tasty but...they lacked punch. This recipe has vanilla, peppermint and Baileys but I don't think the eggless cake mix had enough 'grab' to really let the flavours 'do their thing'. It's still tasty, don't get me wrong. I'm fasting today (Intermittent Fast) and I've eaten two (and nothing else, promise!) so they can't be all that bad. But I think the right vanilla cake base will take these from a 7 to a 10.

So without further ado, food porn!

Recipe adapted from Madhuram's Eggless Cooking

The Ingredients


For those of you not very good at guessing, or too damn lazy to make up your own recipe, this was:

2 Cups Plain Flour
2 & 1/4 teaspoons Baking Powder
1 Teaspoon Baking Soda
1/4 Cup Caster Sugar
1 Can Condensed Milk
3/4 Cup Baileys
1/4 Cup Water
2 Tablespoons Vinegar
2 Tablespoons Vanilla
1 Teaspoon Peppermint
1/2 Cup Melted Butter (or Margarine)
5 Crushed Oreos

I know most people have a method, but I'm just not that type of lady. If I can do this quickly and still have it be tasty, that's how it's going down.

First you need to preheat the oven to 230. This is one area you really shouldn't cut corners when baking. You'll get crappy cakes. I don't know why, you just will. Now take all of the ingredients up to, and including,  the sugar and put them into the bowl of your mixer. Or just a mixing bowl, whatever! Mix for two or three minutes on low to medium. Once combined add all of the wet ingredients and mix again, starting on low then increasing to medium and then high once there is no chance of you getting a face full of cake mix.

Finally, the Oreos. I like mine quite chunky and, again, I was feeling lazy, so I just used my hands and crumbled them roughly into the mix. You could beat them, chop them or even blend them. I honestly don't care. Once in the mix beat again on high for approximately 5 minutes or until everything is combined.


Then either divide into cupcake cases or pour into you cake pan. This made me 18 cupcakes and I have no idea what size cake pan should be used. Just experiment like I did, it's fun. 


I cooked these on the middle shelf at 230 for approximately 15- 20 minutes. You should really be checking your own oven though since, I'm assuming, you're a responsible adult that doesn't wish to burn his/her house down or eat undercooked cupcakes. A pack of toothpicks are relatively cheap, poke the cakes in the centre when they look brown and if it comes out clean and dry (albeit with crumbs), you got yourself a good ol' time.

Once out of the oven, set aside to cool and crack on with making your icing. Now this was a lot more guessing than the actual cupcake mix as I knew a large part of the "Barnamint Baileys" taste would come from here. It was basically a case of tasting and adding and mixing until I thought it tasted right.

I used:

1 Block of Butter (NOT Margarine) slightly melted but not pourable. You'll get more icing this way!
Icing Sugar
Baileys
Peppermint 
Vanilla
Oreos

Add the butter to the bowl and beat for a couple of seconds. Next add the icing sugar and beat til combined.  The amount of icing sugar you add will depend upon two things. Firstly how much of the above liquids you add. The more liquid, the more icing sugar you will need. Secondly comes how you plan on using your icing. If you will be piping you will need to make sure it's firm enough to stand so may need slightly more icing sugar. This brings me onto my next point, how to add the Oreos. If you are planning on piping you will need to make sure the crumbs are small enough to pass through your nozzle. I threw mine in the blender to be on the safe side.


And finally, garnish and serve!